Overview
This guide provides step-by-step instructions on how to create a new role in Quicklizard. Roles define user permissions and access to different functionalities within the platform.
00:00: Introducing the new role creation feature in quicklizard designed for administrators 00:04: to officially manage user permissions. 00:08: This feature streamlines, the process of defining roles ensuring that your team 00:12: members have the right access needed to perform their tasks. 00:16: Navigate to the admin section to access all administrative settings. 00:21: Select the role section to manage user permissions. 00:25: Click on ADD roll. 00:27: Provide a clear and descriptive name for the role which will help in identifying its 00:32: purpose within your organization. 00:35: Add a detailed description to clarify the responsibilities associated with 00:39: the new role, fostering better understanding among your team. 00:43: Define the role. According to the different permissions options manager approver 00:48: or with all permissions editors can suggest changes that a weight approvals. 00:53: Viewers cannot execute any actions. 00:57: Use the toggles to provide a revoke a permission. 01:00: Finalize, the creation of the new role. 01:04: Click here to delete the role. 01:06: If you decide not to delete the role exit the process without saving changes preserving, 01:11: your current setup 01:14: Click here to edit the role you created. 01:17: Unwanted roles can be deleted from the role page as well. 01:21: Confirm deletion to ensure that your role management remains clean and relevant preventing 01:25: clutter. 01:27: Thank you for watching this tutorial by utilizing the new role creation 01:31: feature. Users will experience enhanced control over permissions improved 01:36: Clarity in responsibilities and a more organized approach to team 01:40: management.
Steps to Create a New Role
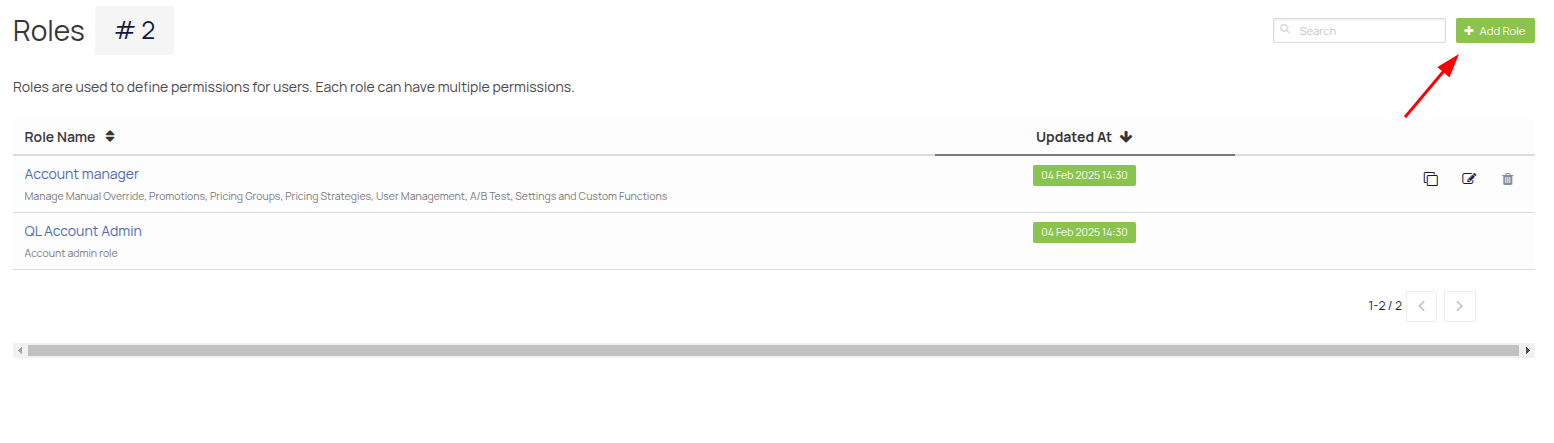
1. Navigate to the Roles Section
- In the left-hand navigation menu, locate and click on Admin
- Select Roles from the list of available options.

2. Click on "Add Role"
- At the top-right corner of the Roles page, click on the Add Role button.
3. Enter Role Details
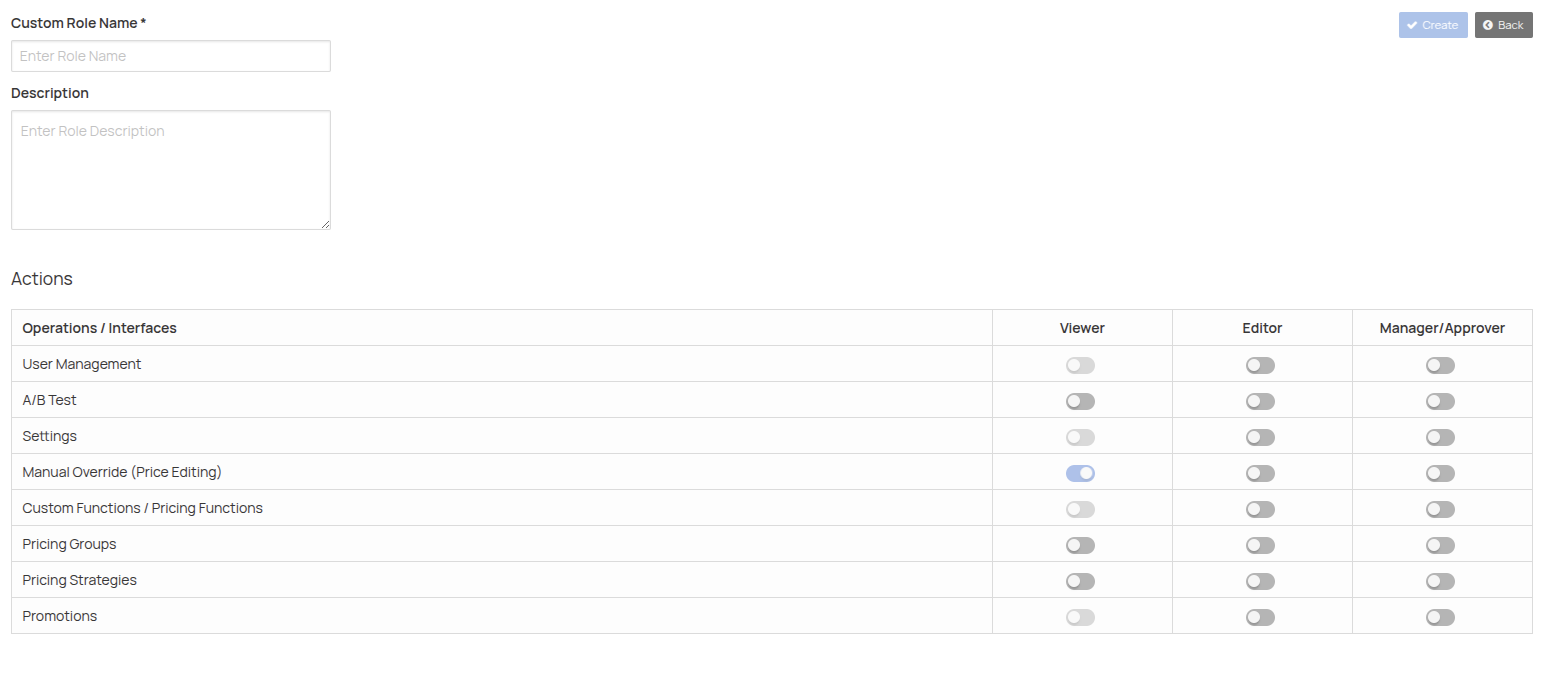
- Role Name: Provide a descriptive name for the new role.
- Description: Optionally, enter details about the purpose and scope of this role.
4. Assign Permissions
- A list of available permissions will be displayed.
These permissions are grouped under different categories such as:- User Management
- A/B Test
- Settings
- Manual Override (Price Editing)
- Custom Functions / Pricing Functions
- Pricing Groups
- Pricing Strategies
- Promotions
- Use the toggles to activate / revoke the permissions for this role.
5. Save the Role
- Click on the Create Role button to save the new role.
6. Edit or Delete a Role (If Needed)
- To edit an existing role, click on the role from the list, modify the details, and save.
- To delete a role:
- Click on the Delete Role button.
- A confirmation prompt will appear: "Are you sure you want to delete this role?".
- Click Confirm to proceed.
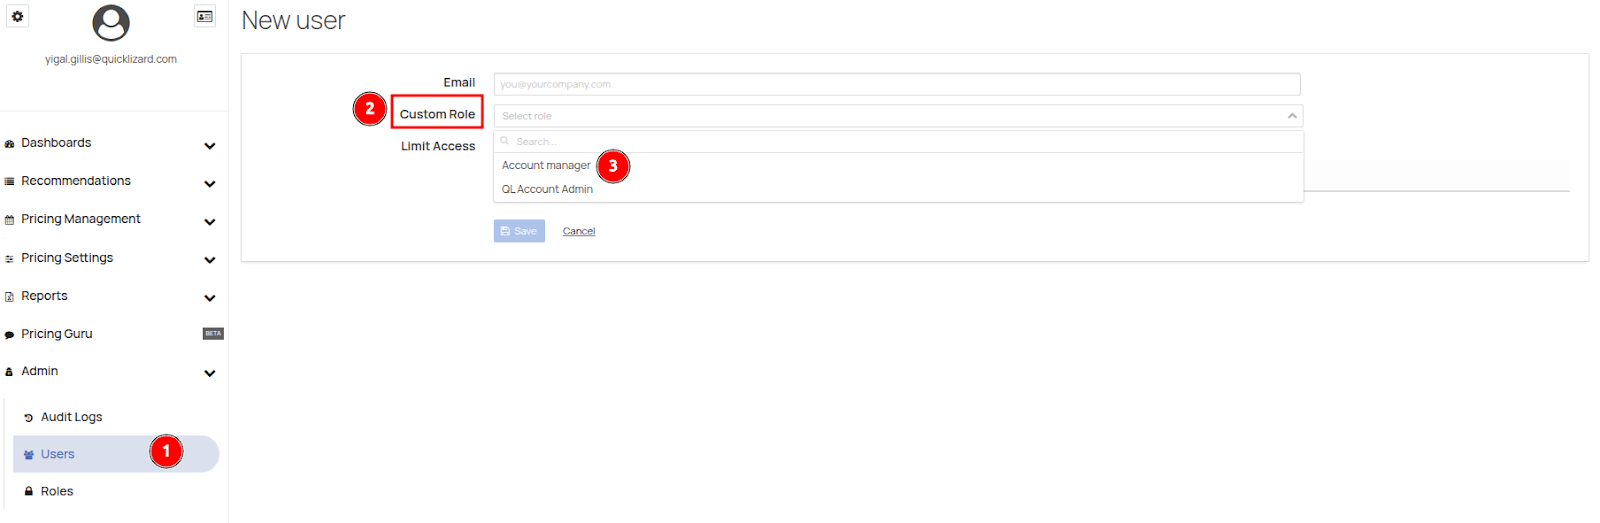
6. Assign a role to a user
- After the new role is created, you can assign it to any user
Comments
0 comments
Please sign in to leave a comment.